Top Horse Classes in Dead Rails: A Tier List
Want to explore the vast wilderness in *Dead Sails* and achieve impressive distances without meeting an untimely end? You're not alone in this quest. Beyond the gear you acquire and the companions you choose, selecting the right class plays a crucial role. To spare you the hassle of endless trial-and-error, dive into my comprehensive **ultimate *Dead Rails* class tier list**. I've done the legwork so you can hit the ground running—trust me, it's a game-changer you won't want to miss.
Recommended Videos
Table of Contents
- All Dead Rails Class Tier List
- S Tier Dead Rails Classes
- A Tier Dead Rails Classes
- B Tier Dead Rails Classes
- C Tier Dead Rails Classes
- D Tier Dead Rails Classes
All Dead Rails Class Tier List
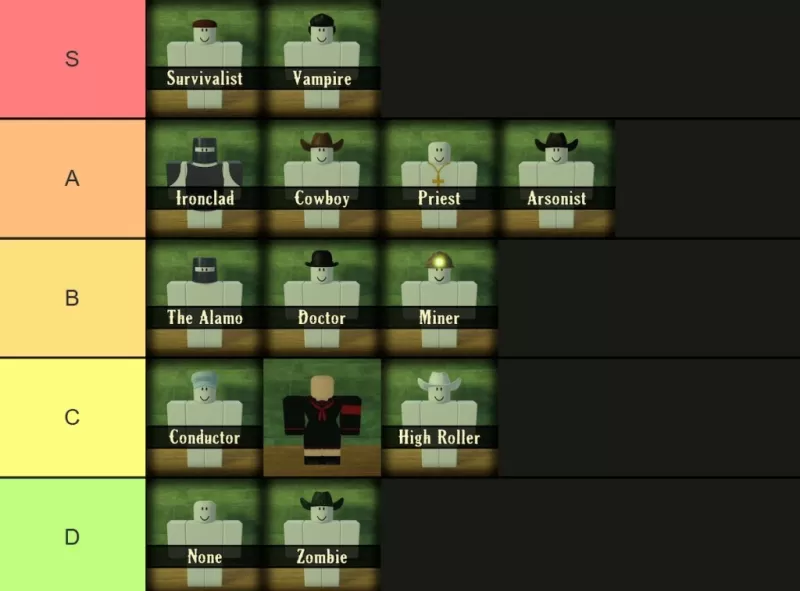 Image by Destructoid
I'm well aware that this Dead Rails class tier list might stir up some controversy, but it's all part of the game. You simply can't go wrong with the Vampire, even after the recent updates. Meanwhile, the Survivalist has surged ahead in the rankings recently. I'm still disappointed with the Zombie class, which remains underwhelming and can't even use Snake Oil. What's the deal with that? Teamwork does play a role here, but it's secondary to having fun with your crew rather than solely focusing on min-maxing.
S Tier Dead Rails Classes
 Screenshot by Destructoid
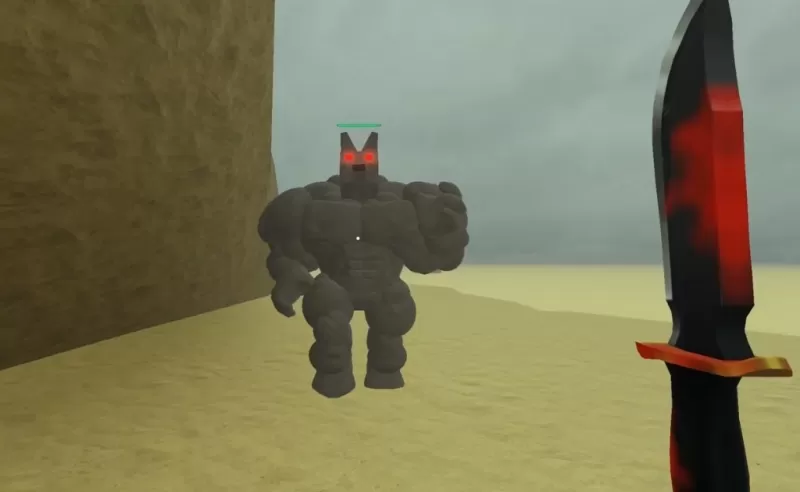
You've probably guessed it—these classes are all about raw damage output. The Survivalist and Vampire stand out with their unique effects and lightning-fast gameplay. While the Ironclad has its merits, these two are the top contenders:
| **Name** | **Cost** | **Info** |
| Survivalist | 75 | The Survivalist starts with a Tomahawk and becomes more lethal as your health decreases. Even at full health, you deal more damage than other classes, though this might be nerfed soon. It excels against tough enemies that are hard to take down. While other classes can handle these foes, none match the Survivalist's raw power. |
| Vampire | 75 | The Vampire is all about speed and aggression. Faster than a horse or sprinting zombie, your melee attacks hit hard—most zombies fall in three swings. The downside? Sunlight is harmful, so stick to the shadows. You spawn with a Vampire Knife that heals with each hit, making survival about maintaining the offensive. |
A Tier Dead Rails Classes
 Screenshot by Destructoid
This tier features classes that are still excellent but less focused on pure survival. They offer good damage output and starting gear, yet they're not as effective in solo runs. In my view, Ironclad holds the most promise.
| **Name** | **Cost** | **Info** |
| Ironclad | 100 | The Ironclad comes fully armored, making you much harder to kill but slightly slower—about 10% slower. Not ideal for solo runs; you'll need a teammate to watch your back. In a team, shotguns are your best weapon, perfect for close-quarters combat. |
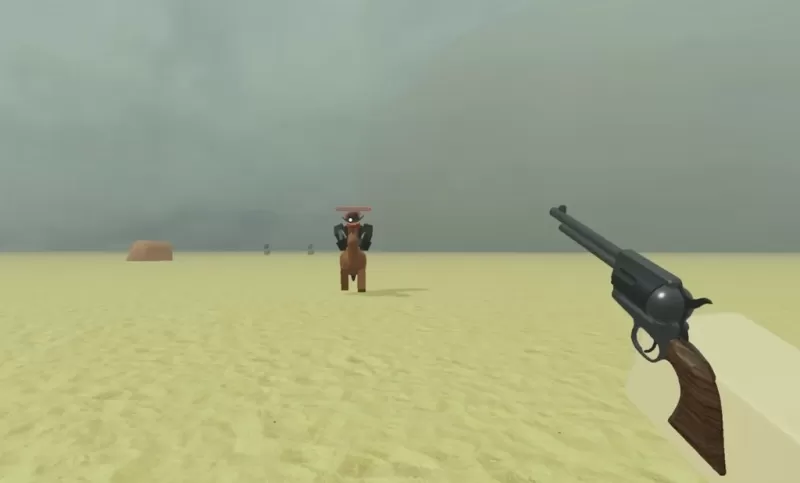
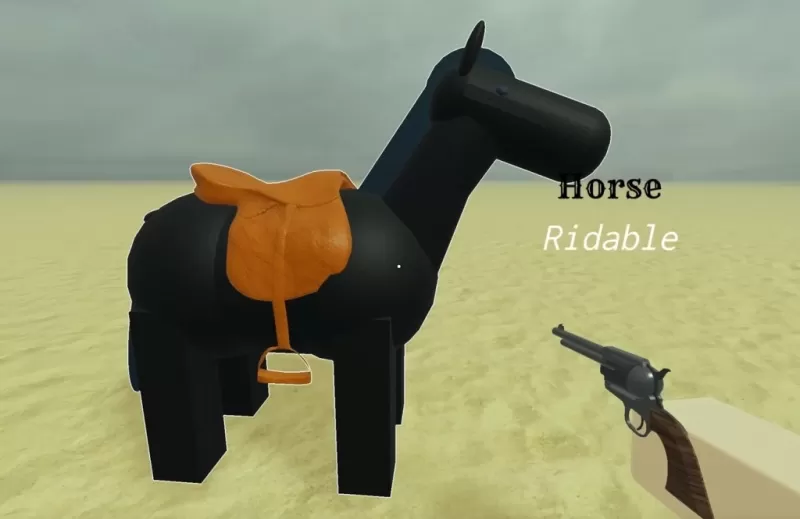
| Cowboy | 50 | The Cowboy starts strong with a revolver, two boxes of ammo, and a horse. This setup eases early-game fights and provides the speed to survive chaotic moments, especially during Blood Moon nights. With the Game Pass, you can sell the revolver for extra cash to enhance your loadout. It's a bargain, too. |
| Priest | 75 | The Priest wields Crucifixes and Holy Water, both powerful against enemies but unsellable. You're immune to lightning, making storms irrelevant. Not suited for solo play, but in larger groups, their throwables can turn the tide. Think of them as spiritual support with a powerful throw. |
| Arsonist | 20 | The Arsonist excels in chaos, starting with Molotovs and a significant boost to fire damage, ideal for clearing groups quickly. Best in smaller areas where you can control the pace, and a horse enhances the hit-and-run strategy. |
B Tier Dead Rails Classes
 Screenshot by Destructoid
These classes are specialists, shining in specific situations. The Doctor, for instance, offers great value and support at a low cost, though you wouldn't rely on them for damage. The same applies to the others, making them invaluable in team settings.
| **Name** | **Cost** | **Info** |
| The Alamo | 50 | The Alamo is designed for defense, starting with Sheet Metal, Barbed Wire, and a helmet. Perfect for fortifying the Train early on. Not flashy, but highly effective under pressure. |
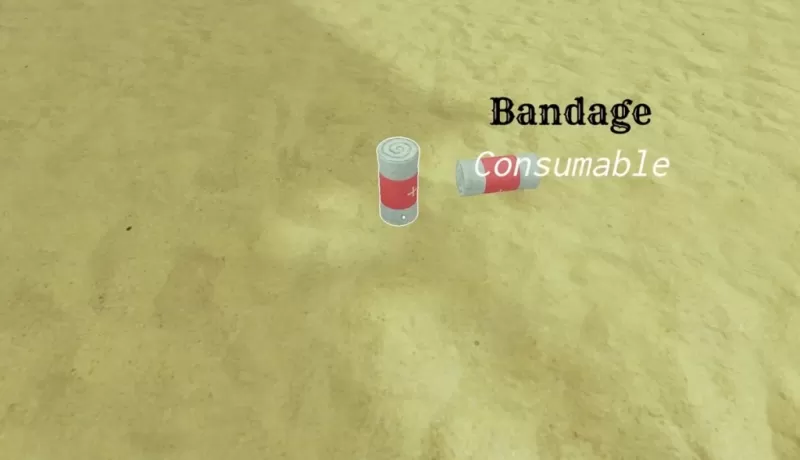
| Doctor | 15 | The Doctor is your lifeline in dire situations, equipped with healing supplies and the ability to revive teammates at half their health cost. One of the cheapest classes, yet invaluable in group play. Keep them safe—they can turn a wipe into a victory. Selling bandages and snake oil gives a $40 boost. |
| Miner | 15 | The Miner is perfect for resource gathering and nighttime exploration. With a helmet for light and a Pickaxe that breaks ore in two swings, they're the fastest at collecting materials, especially new ore types. They also start with Coal. While not combat-focused, their utility is unmatched. |
C Tier Dead Rails Classes
 Screenshot by Destructoid
Similar to the previous section, these classes offer good utility but are less effective solo. The Conductor is nearly essential in a five-stack, while the new Horse class is more of a novelty.
| **Name** | **Cost** | **Info** |
| Conductor | 50 | The Conductor drives the Train, starting with Coal and achieving a top speed of 84. No melee weapon at spawn makes them vulnerable initially. Ensure they're protected—they keep the team moving. They no longer suffer a health penalty, making them less fragile. |
| Horse | Unlockable through the Horsing Around gamemode | The Horse Class transforms you into a horse. Unlocked during the 2025 April Fools "Horsing Around" event, it provides standard horse stats: 32 studs per second speed, no passive healing, and a full-sized horse hitbox. Tight spaces can be challenging. You can ride players, but not the train or other horses. |
| High Roller | 50 | The High Roller earns 1.5x money from bags, ideal for a quick cash boost. However, they're more likely to be struck by lightning during storms. High risk, high reward—perfect for those willing to live dangerously and stack cash early. |
D Tier Dead Rails Classes
 Screenshot by Destructoid
Even the best have their lows, and we're scraping the bottom of the barrel here. The default class is neutral, providing neither advantages nor disadvantages—a great starting point for beginners. Zombies, however, are in a dire state and not recommended.
| **Name** | **Cost** | **Info** |
| None | Free | The None class is the default, starting you with just a shovel and your wits. No perks, no drawbacks—a blank canvas for learning the game and saving bonds before committing to a class. Simple, effective, and ideal for beginners. |
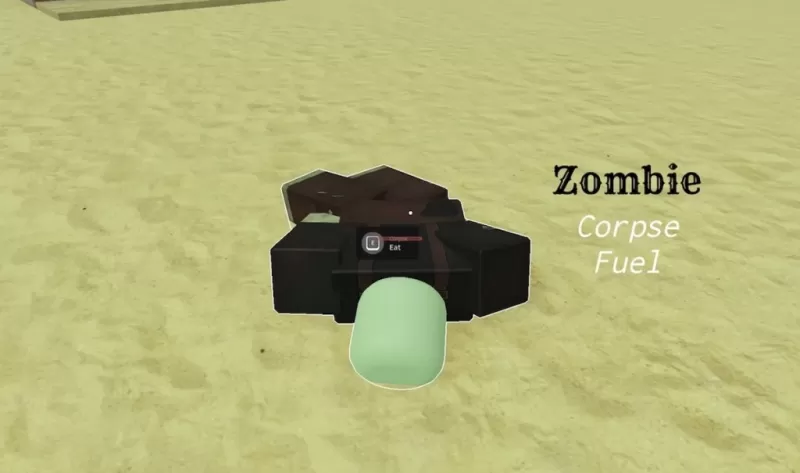
| Zombie | 75 | The Zombie class thrives in chaos, healing by feeding on corpses and sneaking past enemies. No access to Bandages or Snake Oil, but compensated by stealth and sustainability in corpse-rich areas. Unfortunately, it remains underpowered and challenging to use effectively. |
That's the wrap on my Dead Rails class tier list! Use this guide to break records and dominate mobs effortlessly. Don't forget to grab some Dead Rails codes and explore the Dead Rails challenges. Who knows what exciting updates await us next?
-
 Roblox events in 2025 have become more ambitious, polished, and frequent than ever before. From brand collaborations to original content, the selection is truly impressive, though not every event deserves your attention. Some offer incredible rewardsAuthor : George May 09,2026
 -
 Feed the Pup Now Available on iOSThe touching match-3 journey Feed the Pup has officially arrived on iOS, delivering a more heartfelt experience from Plug in Digital. Known for quirky titles like Turnip Boy Commits Tax Evasion, the publisher shifts gAuthor : Ryan May 09,2026


- Classic WoW vs. Turtle WoW: 6 Key Differences
- Ultimate Guide to Shinigami Progression in Hollow Era
- Roblox Simulator Codes: Unlock Exclusive Rewards!
- Mastering Two-Handed Weapons in Elden Ring: A Guide
- Wuthering Waves: Uncover the Secrets of Whisperwind Haven's Palette
- Top 25 Palworld Mods to Enhance Your Game